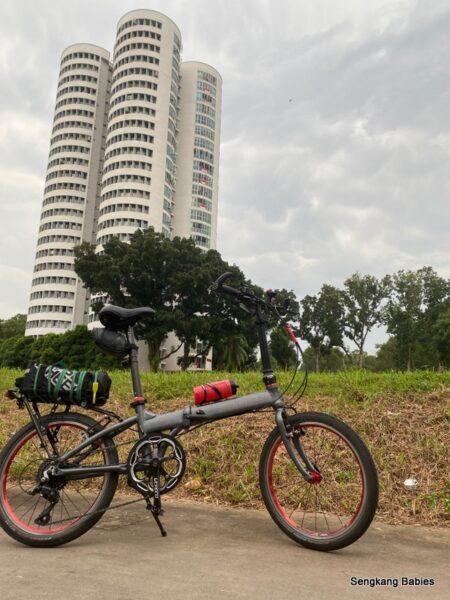
Just completed a mini project to upgrade my crankset and bottom bracket from Square taper to Hollowtech.
This is inclusive of crank and bottom bracket, refer YouTube (link).
Disclaimer: I am a newbie and some of the steps might be wrong, please guide me if I am wrong.
The upgrade is not straightforward for a newbie (2 days exercise), but I had fun researching the tools and techniques. Have LEVEL UP my bike maintenance skills too.

Upgrade: Square Taper to Hollowtech and Chainring from 53T to 56T
1)Why Hollowtech?
I still cannot tell the performance difference between Square taper and Hollowtech.
But I know Hollowtech will be easier to maintain and clean. It is tedious to remove the square taper bottom bracket.
Hollowtech is much lighter than Square Taper, I assume it is more efficient to channel leg power to speed? (Need to quantify)
Shimano is a more established brand, but I chose LitePro for my trials. The same skill and tools would apply should I decide to upgrade to Shimano in the future.
2)chainring sizing? 56T,58T or Oval
(All things similar before and after the upgrade)
The improvement is tangible. You will feel the additional effort needed to pedal, but bike seems faster on straights.
Some will recommend 58T, 60T or even Oval!
-Effort for 56T 7th speed feels like 53T 9th speed. You definitely need to pedal harder to reach 56T 9th speed.
In other words, 58T and 60T are for FITTER cyclists and not leisure PCN riders! With 56T (+), it will be more strenuous to climb hills too. Some claim oval chainring will help with climbs.
56T is a step up from 53T, to train my legs and lungs. Looking forward to improve my average speed too.
 Pedals removal, you need 6mm allen key and take note of CW and CCW directions.

3) Difference between bike shop assembly and diy
It took me 2 days to assemble the new hollowtech crankset (includes removal of square taper). Professionals would complete it within one hour.
It was an opportunity to know my bike better and understand what might be needed for the next upgrade (poison).
Estimated price difference, the crankset would cost me $60 but a bike shop would charge $90 (excludes tools). I have included the Shopee and Carousell links at end of page for the parts.


4)Dismantle chainring and square taper
Refer to my YouTube for the sequence.
Steps to remove Square Taper components (* means tricky) :
4a) Remove pedals
4b) *Remove Chainring
4c) #Remove chain (optional)
4d) *Remove Square Taper
4e) Hollowtech Bottom Bracket (use spacers only if necessary)
4f) Mount Drive-side Chainring and Crank
4g) #Mount chain
Do remember to set chain to the smallest cog.
It is recommended to remove the chain too (maybe can clean chain and cassette too).
The challenge for me was remembering the clockwise (CW) and anti-clockwise (CCW). For both driveside and non drive side.
Refer to image above for the Square Taper tools. Ensure ALL tools are available before you start. Including WD40 and minimum A-stand.
 After pedals are removed, proceed with chainring dismantle. You need 8mm allen.

Removal of chainring retainer (CW for Drive side). This step is tricky as the tool might not seat in with the groove. 
Repeat for non drive side (CCW).
View of Square taper bottom bracket after Chainring removal.
Remove square taper bottom bracket from non drive side first (CCW).
You might need to spray WD40 inside if “ring” or “groove” is dirty. This might help tool to grip onto the groove.
Refer image below.
The tool will keep slipping off. You might need palm to “push” tool in before you turn the wrench CCW.

Ring removed from non drive side.
Repeat on drive side (CW)
The old square taper bottom bracket. 
Clean the frame and apply grease for hollowtech bottom bracket insertion.
Tools needed to mount Hollowtech bracket.
The bottom bracket spacers are optional. Use only if chainring is not aligned with cassette (chain line).

Next, assemble chainring (5mm allen) and crank from drive side.
Refer image below, the “screw silver plates” should be behind the chainring.

Image below.
Grease axle and insert chainRing. Ensure flush with bottom bracket (no gap). 
![]()
Grease non drive side before inserting the crank. Ensure both cranks position is “straightened”.


Tighten non drive side crank, there should be a “dust plug”.
Done. If gear changing is not smooth, you might need to tune the rear derailleur.
I will share the chain maintenance in another blog post.
Meanwhile, you can try “Fast Orange” to get rid of the stain and grease effectively.

Shopping list:
-$60+ Litepro Hollowtech set (includes chainring, cranks and bottom bracket)
-$10.90 Square taper tool set (+ cassette removal)
(Just borrow from friends if you are not going to go back to square taper)
– $5.90 Hollowtech bottom bracket tool (many more variants online)
-I am still looking for a good torque wrench (any recommendations?)
Additional Square taper to Hollowtech tips and tools recommendations:
1)Ensure tools (including grease) are available before start (torque wrench and bike stand are nice to have). Chain Quick Link plier is recommended.
2)Just borrow Square Taper tools, since we are unlikely to reuse them once you go Hollowtech
3) First timers will find the clockwise and anti-clockwise confusing. Follow YouTube experts.
4) If you need someone to fixup the bike, I would recommend a friendly mechanic (Tampines). Ace is a home-based mechanic, friendly and helpful. His Litepro Hollowtech parts are priced competitively and no hard-sell (Carousell @eaBikes).
5) Cool videos: Very helpful to understand more about Foldies
*Mount Hollowtech Drivetrain (https://youtu.be/yorKtxwbxYY)
*Build a Crius Velocity! (https://youtu.be/AOVcbuYfcSI)
It is harder to find maintenance videos on Foldable bikes. YouTube mostly covers road bikes and mountain bikes. And bulk of Foldable bikes videos are from non-English sources, like Indonesia and Philippines.
5) Have added reference videos for your homework:
-Free to Cycle ( https://youtu.be/9che9-kfW0Y)
-GCN (Pedals) (https://youtu.be/YmPkYMPVqQU)
-GCN (Bicycle chains) (https://youtu.be/rWchudX-Tqs)
-Bike Sauce (https://youtu.be/ditD5cZ8dP8)
-Park Tool (Bottom Bracket) (https://youtu.be/xUtOeFJJycg)
My own YouTube – Removal of Square Taper, installation of Hollowtech

As I have indicated at the start. I am still learning, and I would appreciate more sharing from the experts out there.
Will be trying to remove my cassette for the next project.
Happy cycling!
Do follow my cycling journeys too.
* MTB\RoadBike\Foldie selection, & Foldable bike shortlisting
-Cycling around Singapore (YouTube)
* Follow my family’s cycling experience here .
-Instagram SengkangBabies #skbCycles or #skbHiking