The hike up to the Pinnacles Hut (Coromandel, different from the pinnacles in Perth) was filled with anticipation and excitement. I have seen Instagram photos of the famous Sunrise and Sunset, and I hope the weather was kind to me 🙂
First, I need to scale 2.5hours to Pinnacles Hut, followed by another 50 minutes hike up to the Pinnacles (GPS -37.047568, 175.715745)
YouTube link for Hiking Pinnacles (Coromandel NZ)
The Pinnacles can be scaled as a day trip, but I would strongly recommend one night stay at Pinnacles Hut. You can then enjoy either Sunset, Sunrise or both! Kiwis refer to hiking as tramping 🙂

On the way to Pinnacles Hut (Coromandel Forest Park), Thames would be the last town before your hike, I enjoyed my Hawaiian burger at Bayon Expresso. I heard there is another cafe selling famous kiwi burgers (Mad Kiwi Burger).
Stock up on your water and nutrition needs.

You will pass by Department of Conservation – Kauaeranga Visitor Centre . Have a toilet break and grab some maps, check out the temperature at the Pinnacles Hut.
There are some pictures of early logging days. If you are lucky, you might bump into kiwis during the hike (maybe 1 in 10,000 will see this rare birds).

After the visitor center, there is another 8km of gravel road to drive in. Go slow as the road could be slippery, contains pot holes and some blind spot corners.
There is a carpark at The Pinnacles trail head (Google for Kauaeranga Valley Road End). The carpark can be full during weekends, many hikers in New Zealand!
Tip : Keep your belongings out of sight, as we do not wish to tempt anyone.
Sign indicated a 3 hours hike up to the Pinnacles Hut. Along the route, you will see more signboards ahead. Research told me to avoid “Billy goat” as it can be muddy.

Many New Zealand nature parks require us to clean our boots before and after. The dirt on our boots might kill off native New Zealand kauri trees.

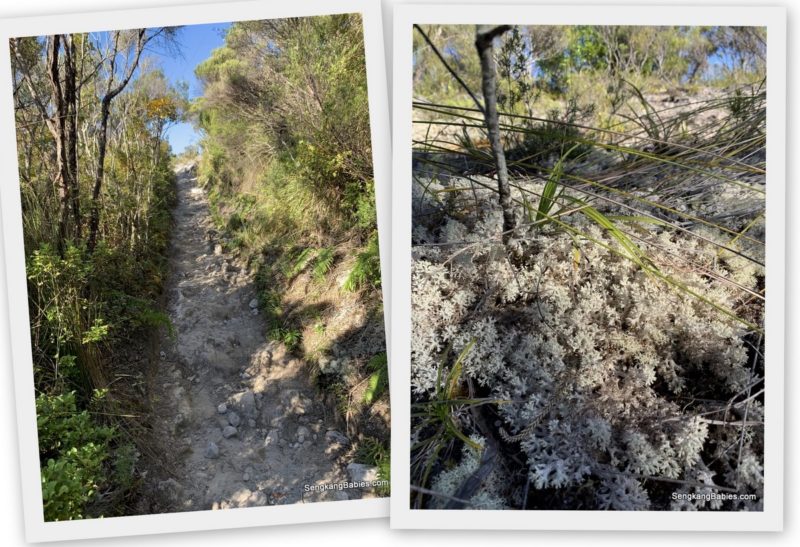
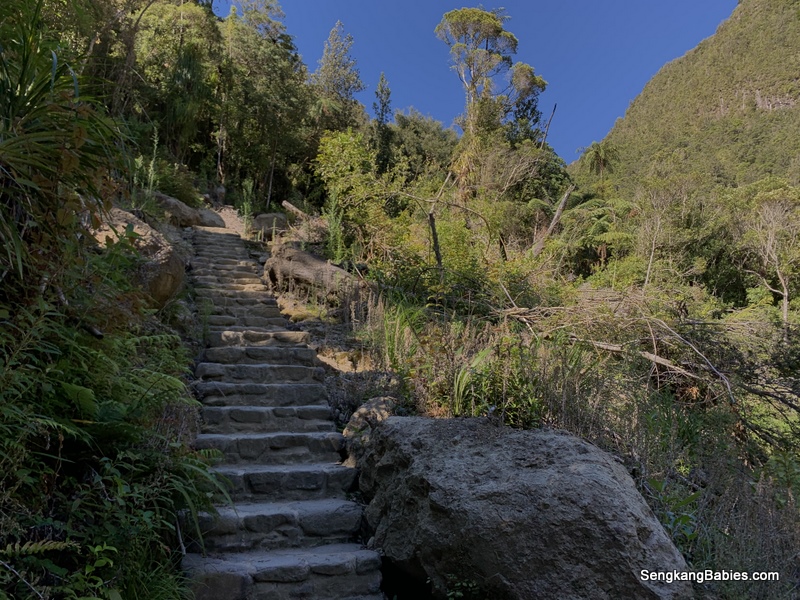
The early part of the trail is flat, meandering along the riverbed.

You will walk across many swing bridges along the way (should be 7 or 8 ) . 


The first 90 minutes is tough.
Uphill was tiring and breathless, and a lot of cobblestone pavement (uneven).
With my full backpack (maybe 10 to 12kg), I took three water breaks along the way. The best decision was to leave my tripod and DSLR in the car :p
This was a tough decision, as I had wanted to practice some star trail. But the equipment will bogged me down.

The 2nd half of the trail is significantly easier, more downhills.
Do take note some of the downhill steps are steep and might hurt your knees. Go slow.
Another common sign would be “Flood Detour“. During rainy days, the streaming water might be challenging to cross, we can use the swing bridge as alternate route.
During dry weather, just step over the rocks and cross the stream.


*Do remember to bring enough water for hydration and apply thick layers of sunblock lotion. Nothing like a crunchy juicy apple to keep me refresh 🙂
While we are resting, listen to the quietness, or occasional birds crooning.
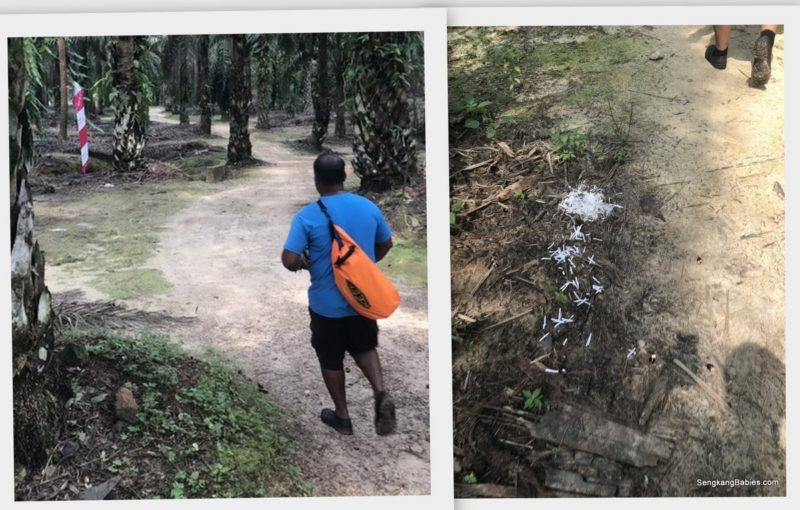
Kiwis are very proud of their flora and fauna, hikers should not leave any rubbish along the trail. Even after we leave Pinnacles Hut, we are supposed to bring all our rubbish down 🙂

There is one spot which has has a landslide sign. Do not linger or take photos :p

This is a weird junction. Both directions are 1 hour to the Pinnacles Hut.
Cobblestones and more uphills, I wonder how the early generation struggled to lift the heavy logs and equipment!
During rainy days, cobblestones might be slippery and trails muddy.
Beautiful moss-covered corridors. I had climb this trail during summer, and the warm weather (25 degrees!) was a bit tough.
Enjoy the beautiful scenery and forested pathway. You will bump across fellow hikers, all are friendly and cheer each other on with “Good Day!”

Once you see this fallen log, you are 20 to 30 minutes away. Take a selfie and Soldier on!

I took 2 hr 20 minutes to reach the hut, 40 minutes faster than advertised 🙂
Most will complete with 2.5 hours.
Saw some fit folks trail run up the slopes too.

If you are aiming for sunset, please plan your timing accordingly and give allowance for rest and Hut “checkin”.
Hikers would normally checkin to Pinnacles Hut, leave the heavy bag behind, and hike (climb) light for another 50 minutes to The Pinnacles.
Trampers get to enjoy two more hours of sunlight during Summer.

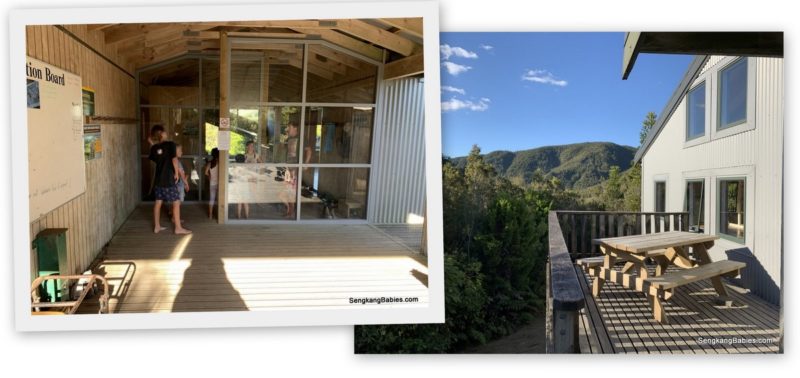
My first New Zealand Hut! But is this a childcare centre? So many kids greeted me at the entrance.
I was amused how the kiddos survive the torturous hike haha. Three families were there to celebrate a birthday wow 🙂
*Do take note that you must book The Pinnacles Hut before your hike. This popular Hut (sleeps 80) can be packed during Summer. Just go to DOC website, choose The Pinnacles (Coromandel region) and pay NZD $15.
House rules:
-no littering
-take care of the bunk and equipment
-no food in bunk (only in kitchen area)
-no open fire
Do take note that Huts only have mattress. Hikers are supposed to bring your own sleeping bag (liners optional). No need to layer up (maybe max 2 layers) before you sleep, otherwise you will perspire inside the sleeping bag.


Pinnacles Hut look like a chalet.
Well equipped kitchen! We heard from the warden that Pinnacles Hut is one of the best hut (in terms of equipment and general condition).


Additional tips :
-Bring slipper along, shoes and boots are not allowed inside the building
-Toilets are available. Called Long Drop, because the poo will drop into a pit (do not drop your iPhone) . The smell is bearable, and toilet paper is available. However, you are recommended to bring your own toilet paper to other huts (just in case).

-If you are a light sleeper, bring a ear plug. Snore symphony echoes throughout the bunk.
-Most will sleep by 10pm
-There is no illumination and power plug inside the bunk
– Get a headlight. For night toilet visit, and when you are hiking for sunset and sunrise.
-Shower facility is available but I am not sure whether there are warm water

The following photos will show the wonderful Sunset and Sunrise at the Pinnacles.
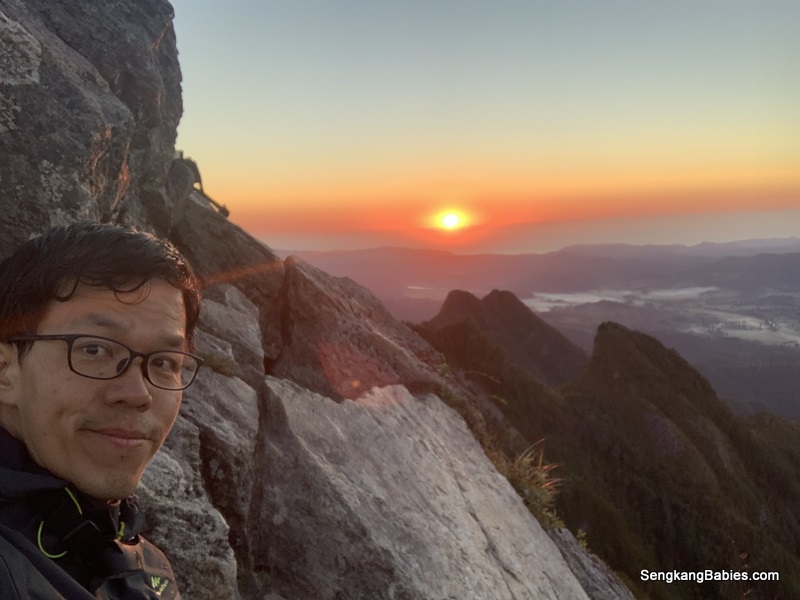
If you are going for Sunrise climb, do reach the peaks 30 minutes before. (there are many steps!). The orange hue before the Sunrise is amazing.
Although the estimated climb is 50 minutes, one can complete in 30 to 40 minutes during the day. For sunrise, cater extra time to hike during pitch black, maybe go in a group.

First 10 minutes are easy, then steps and ladders ! But the panoramic views from the top are worth the efforts.

Catch your breath every few steps, the vertical steps can be pretty tiring.

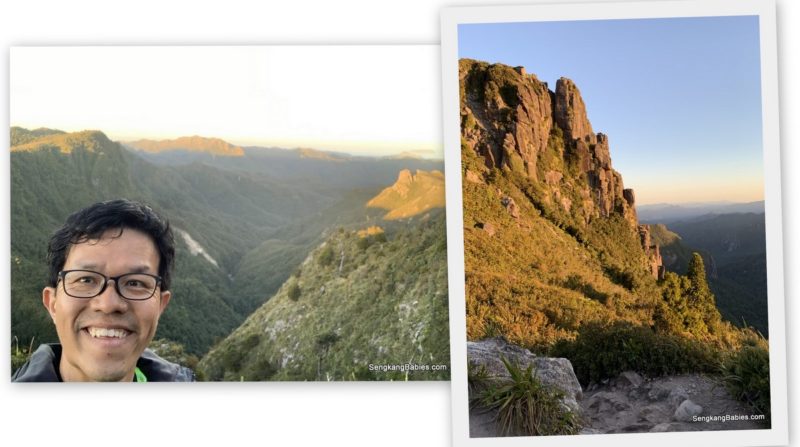
Innovative ladders and stairs are bored into rocks. Certain sections might make you wonder to turn left or right, always look for the ladders.
Do not climb over the boulders, as a slip or strong gust of wind might blow you over. It is windy up there, with little shelter.


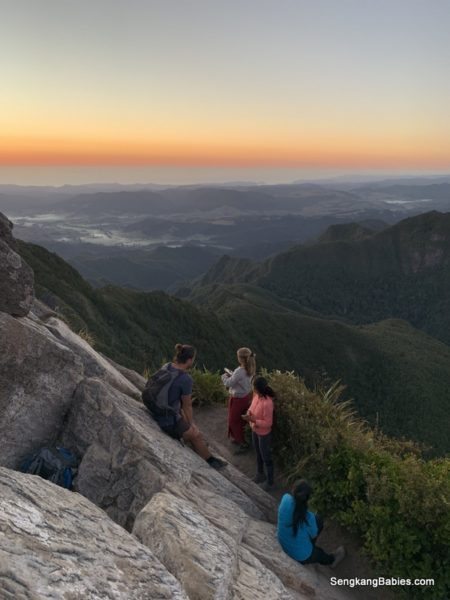
Waiting for sunrise or sunset, why not do both 🙂


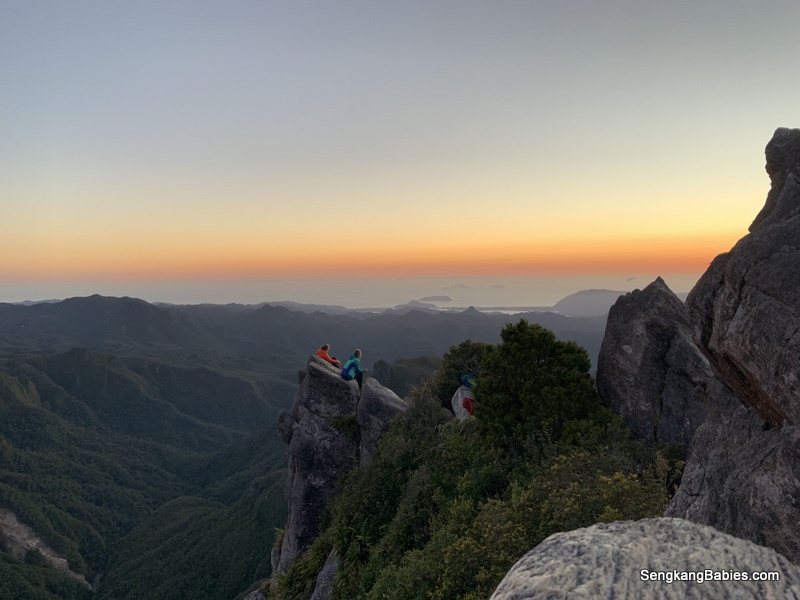
Look at the tiny humans coming down the ladder.
This Pinnacles Hike is doable and a Must, since you have already hike up to Pinnacles Hut, make that extra effort to catch the Sunrise.

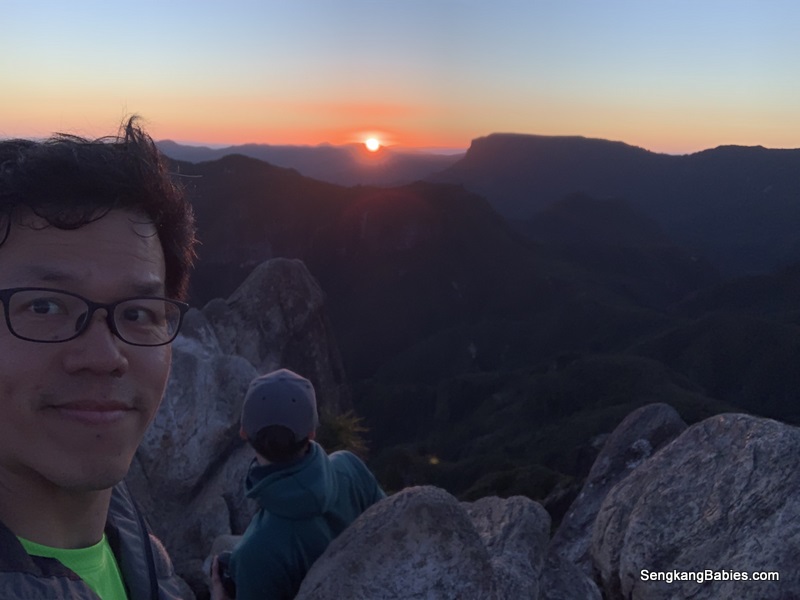
Sunrise at 7am (check the timings).
But I find the pre-Sunrise orange hue more enticing and beautiful. Do arrive 20 to 30 minutes before Sunrise.
The morning temperature might be 10 degrees around Summer.
Look closely at the clouds covering the valleys.

One of my favourite photo, the photographer’s silhouette, the orange horizon, and the moon. 
Jagged hill and range from Coromandel Peninsula. 

Sunrise at Pinnacles Hut wraped up my New Zealand adventure 🙂
Bidding The Pinnacles Hut Goodbye!
I took 1 hour 45 minutes to reach the carpark, go easy on the knees.
I might recommend that you take a dip at Hoffmans pool too (Google map link, GPS -37.107391, 175.635341). Just take note the water is icy!
Skinny dip is optional, but liberating :p
(this pool is isolated and easily missed on the return trip)


On hindsight, I missed my Bak Kwa (pork jerky) at the top! It would be so comforting to snack on my favourite “energy booster”. Too bad my Bak Kwa was confiscated at airport custom.
Chat with the international visitors, I met folks from Sweden, Germany, France and even Chile! (Very few Asians though).
Video from our Facebook : There is some snippets of Sunset and Sunrise at the Pinnacles
Research and more research.
1)DOC (Department of Conservation) maintains the parks, mountains and huts in New Zealand. Check out their website for Dos and Don’t.
Pinnacles Hut was my first New Zealand Hut and I love the experience and community friendliness.
*Do take note that you will need to buy the Hut tickets (NZD 15) at I-site venues before you hike. And Pinnacles Hut need online reservation beforehand. (get your maps at i-sites too)
DOC Link
DOC Staying in a Hut
2) Backpackers delight and tips. I am not officially a backpacker, but the tips were very useful for my reference. Food, Stay, Attractions, Hikes and culture.
BackpackerGuide NZ link
3)Pouakai Hut at Taranaki (Egmont) was supposed to be my first hut. But I failed to submit the trail (too late and dark).
Otherwise, the Taranaki tarn (or reflection tarn) will be a splendid pond to reflect Mount Taranaki! This Mountain is featured in Tom Cruise’s Last Samurai movie (and Mount Taranaki is also known as Japan’s Fuji).

4) Follow my Instagram #SengkangBabiesNZ for some of the photos

5) If in doubt, just Google. I was searching for the best recommended cafe and eatery in town, and most cafes do not disappoint. Friendly staff, delicious pies and meals. Do read our Google Map Hacks blog post (Tokyo)
There are countless hiking and cycling trails in New Zealand. Love the adventurous itinerary, keep the country clean.
6) Strava of Pinnacle up and down


Other New Zealand posts:
– New Zealand North Island road trip
– Hike up Pinnacles and staying in a hut
– Crossing unreal Tongariro Alpine in Summer (my best hike ever)
– New Zealand cycling trails – Old Coach Road (Freedom!)
– Cycling NZ with Cycliq Fly6
*More New Zealand Photos on our Fanpage album (link)