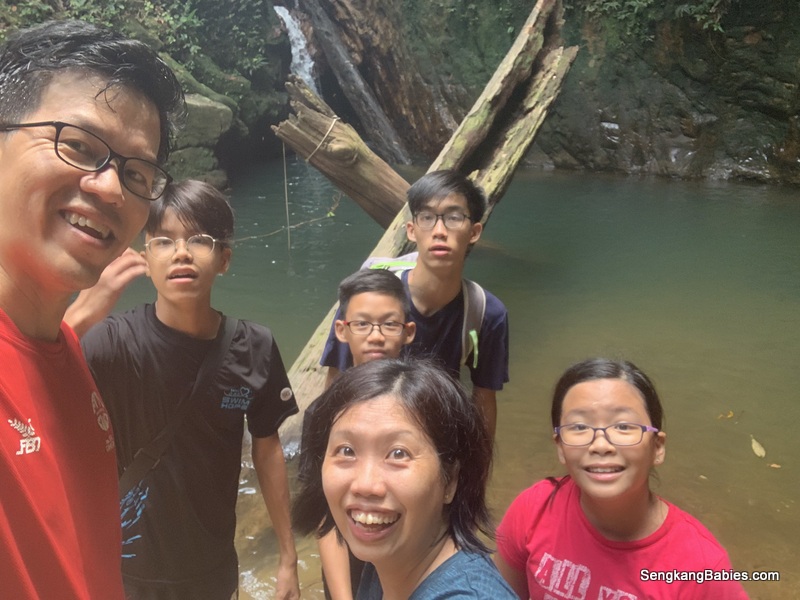
Pelepah Waterfalls is one of the cool Johor waterfalls. Situated in Kota Tinggi, I had visited Pelepah Waterfalls in Sep 2018, read the fun review here.
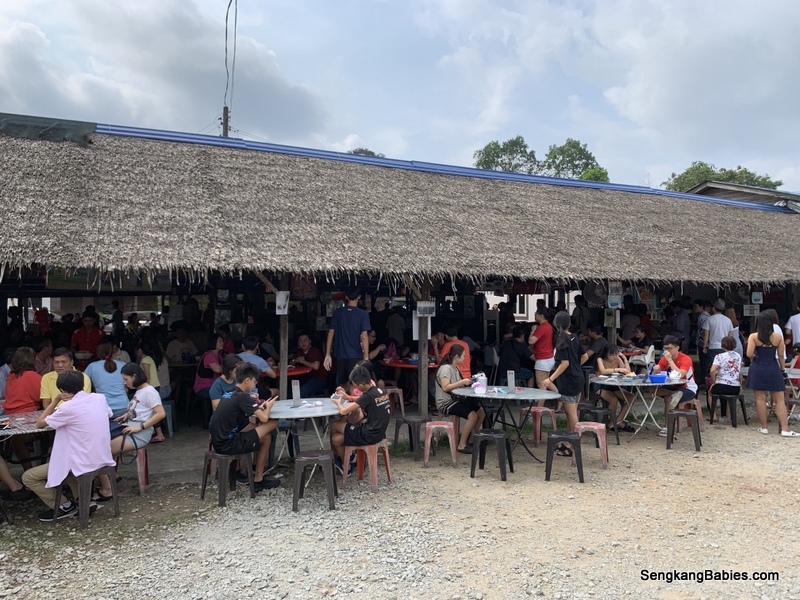
We make a slight detour to Kiang Kee Bak Ku Teh 强记肉骨茶 (GPS 1.827193, 103.958769).
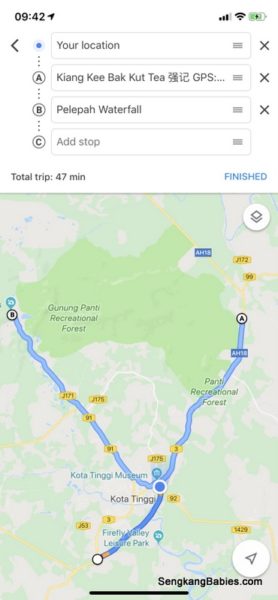
A=Kiang Kee, B=Pelepah Waterfalls trailhead
This is a popular pitstop for those heading North East to Mersing. And Kiang Kee is now officially our best Bak Ku Teh in Johor (replacing Hwa Mei 华美肉骨茶 )
Must top up our energy before exercise, many families were here early to enjoy the herbal goodness too.
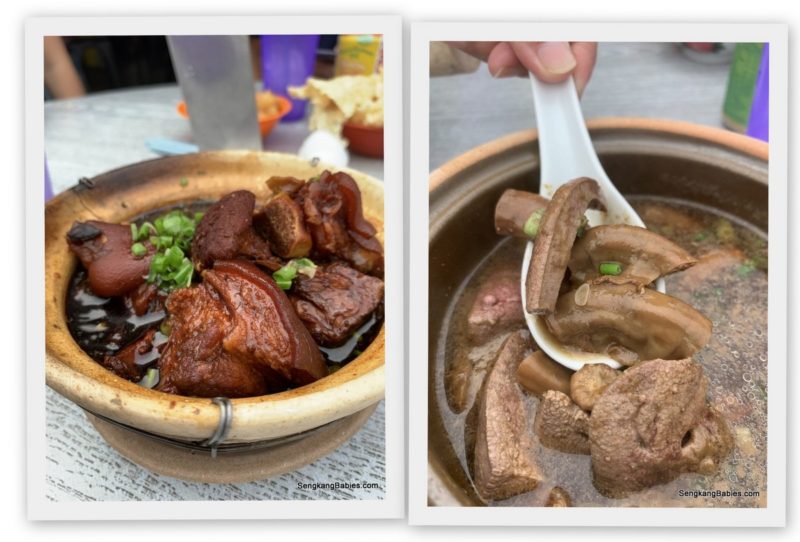
Yummy! Our table dishes came up to 80 ringgit only.
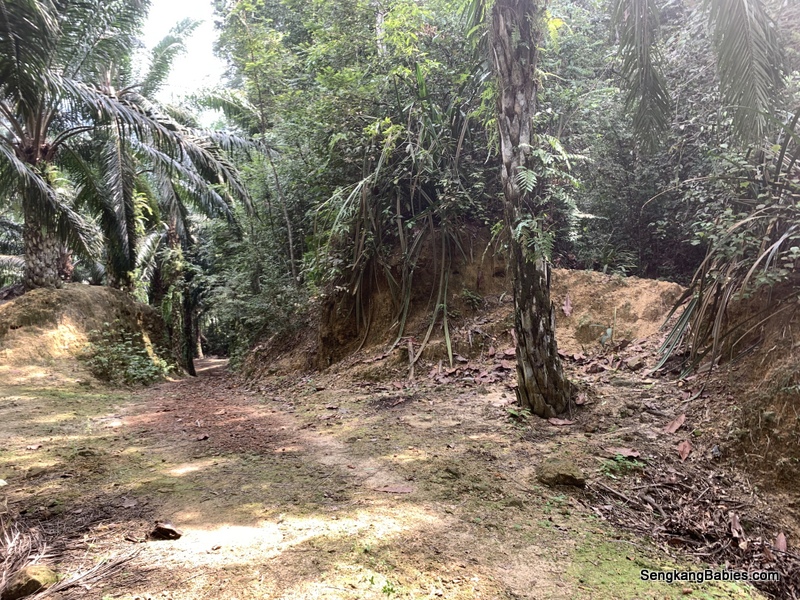
After a 30 km drive, Pelepah Waterfalls trailhead is just in front of Kota Tinggi Waterfalls entrance. The carpark is just 20m ahead, a side entrance on the right (no need fees).
After parking the car, we backtrack and went under the bridge.
Kids were a bit hesitant about getting their shoes wet so early, but there is no ESCAPE haha.
You will only walk 30m before turning left and climb up to the gravel road.
10 minutes from the bridge, you should see this pond on your Left (below photo).
Alas, the trail markers (aka ribbons) have all been removed! Otherwise, hikers could just follow the red/white ribbon to the waterfalls.
We would not recommend first timers to explore this trail yourself, you could accidentally end up at Gunung Panti (Our 2016 blog, many steep climbs)!
No permit or guide is officially needed for Pelepah Waterfalls trekking.
You should go with someone who knows the way, or follow a Meetup group.
We had a friendly guide dog. But do not pet the wild dogs as we noticed its eye was infected.
5 minutes from the Pond, you will cross this stream.
10 minutes from the stream, you will hit a Y-junction.Turn right and walk up a small slope.
We only had two day bags. Do pack whistle, head torch, first aid pouch, water (we had 2 x 1.5l) and snacks.
Turn left over the small gap, and turn left to go down the slope.
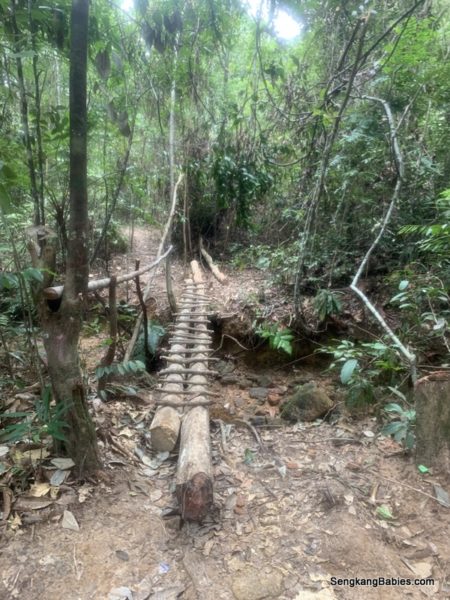
You will see this “bridge” after about 10 minutes.
Remember the Y-Junction earlier, we took the wrong left-turn and nearly hike up to Panti! (Do not follow the yellow tags and signboard unless you are going to Gunung Panti )
Yellow is pointing towards Gunung Panti, not Pelepah Waterfalls!
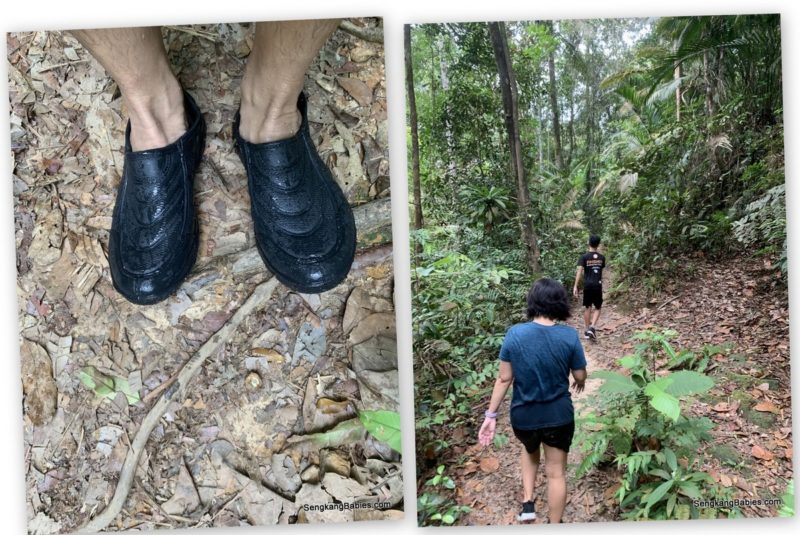
Back to our trail, my first pair of Kampong Adidas. I should have worn a pair of socks, my toes felt uncomfortable when walking downhill (lesser grip). Flat road and uphill no problems.
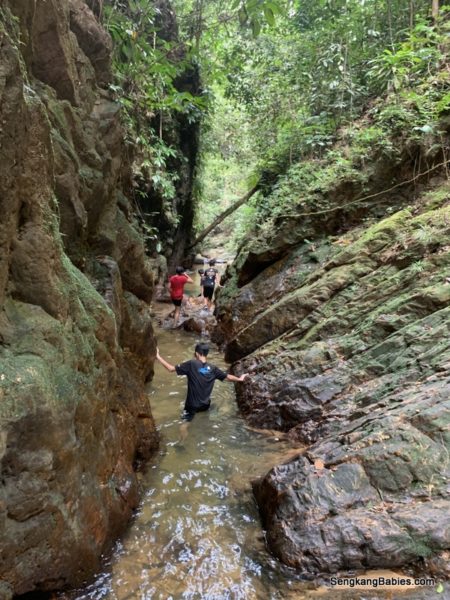
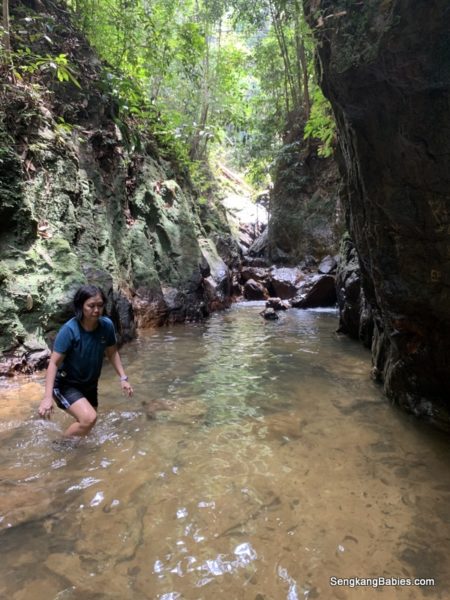
Once you see this pond, the way ahead is straightforward. And Beautiful!
Just be careful with your steps. Rocks (green algae) can be slippery, you should “tap twice” to make sure the surface is not slippery.
Make sure the water is clear (not murky) before you step down, you could accidentally slip and twist your ankle.
Be vigilant, go slow and everyone should be safe.
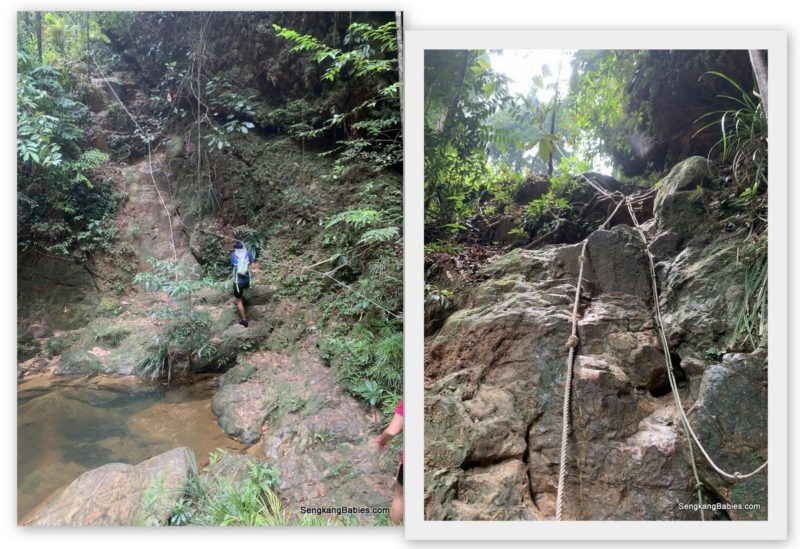
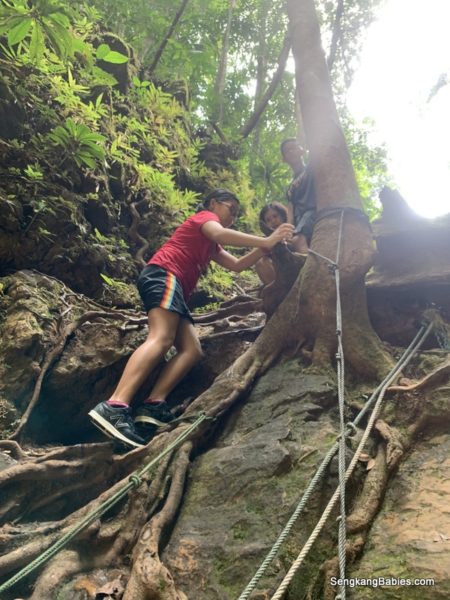
The rock wall is the first Major obstacle. Grip the ropes and slowly pull yourselves up. The stronger one can station half way and give a supporting hand.
This would not be a challenge for the kids, but Mommy need some reassurance. The climb looks intimidating but can be overcome.
On the other hand, I keep reminding kids to grip tight. One slip and you can land badly.
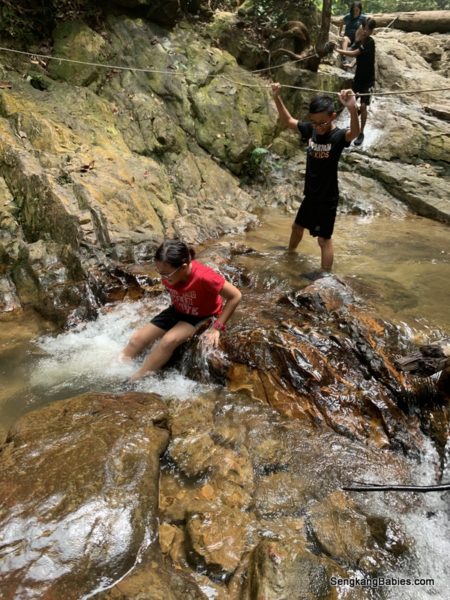
After 5 minutes, you will see this mini waterfall. Take a short break here and dip in the cool water.
There are ropes to mark the “deeper pool” areas.
Picture below (left side with ropes), this is the 2nd rock face.
Go slow, step properly, get a firm footing and you should be ok.
This rock faces is tough for Mommy as she never participates in a lot of outdoor activities. But it is super easy for those who have attempted Gunung hiking before.
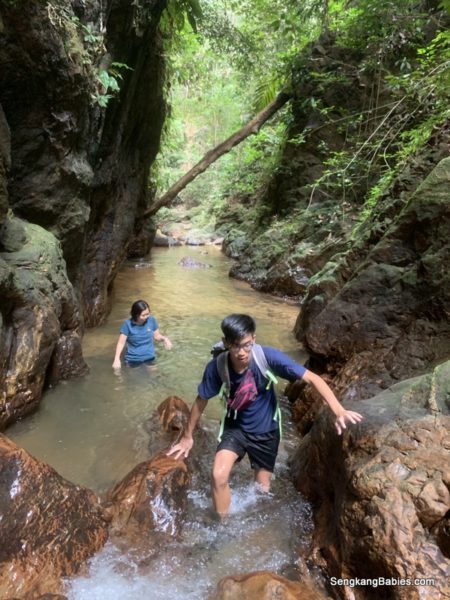
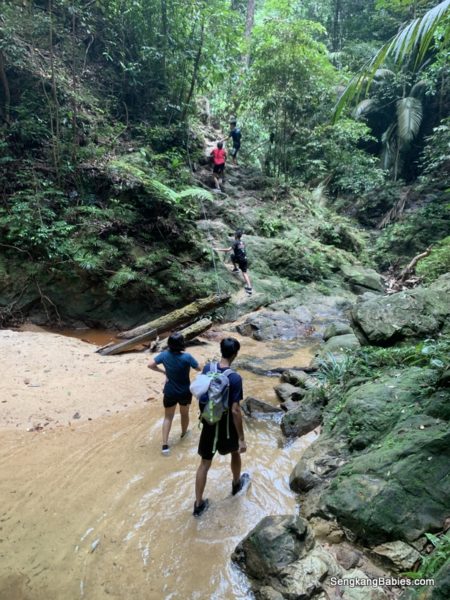
5 minutes from the 2nd rock wall, a corridor of cool water awaits.
REFRESHING! Water can be up to 1 metre at some sections.
Climb up this ladder at the end of the 80m corridor.
Another waterfall awaits. This is the 2nd waterfall and we had our “lunch” here. Kids had fun trying to trap the fishes too.
The fallen logs demonstrated the power of nature. The trunks might have fallen during a thunderstorm.
If there was a heavy rain beforehand, you might want to avoid Pelepah Waterfalls (or other Johor Waterfalls hike). Water might suddenly gushed down.
There is actually a third layered waterfall, but we decided two waterfalls for the day is enough. The Mrs had struggled after two rock faces hee hee.
We had taken 2 hours to reach the 2nd waterfall. If you are relatively fit, you should be able to reach the 2nd waterfall in under 1 hr 30min (estimate).
You may visit the 3rd waterfall in my previous Pelepah Waterfall blog.
Heading back.
More water fun and chills.
By the end of our trek, kids would prefer water walk over sand trail anytime!
Scenic water bodies.
We scored A for Team effort!
We need to look out for each other.
Someone topo (navigate) infront.
We swap the load around.
Pull each other across obstacles.
I had to play the Chief Motivator Role.
Mommy’s smile says it all. Although she is not athletic, she is willing to try everything with the family. Kudos!
She even brought back a leech souvenir to the car park.
Our trail was roughly 2 hours, super slow and easy pace.
Pelepah Waterfalls hiking distance
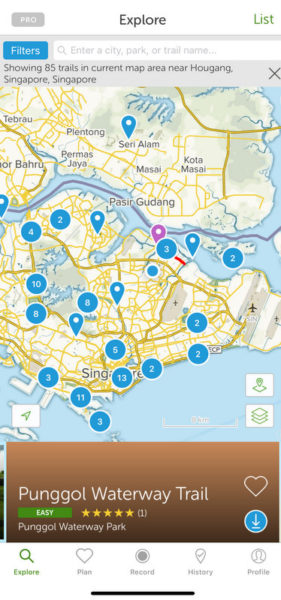
AllTrails App recommendation
I would like to recommend another hiking app, AllTrails (Android and IOS)
-App allows us to Record our path and we can simply follow steps back , if we should be lost
-App offers trails recommendations from fellow hikers, with photos too. This would be good when I am traveling to a new place.
-Free version of App serves my purpose
-You only need mobile signal, 4G not needed
-GPS will drain faster, prepare extra power bank for phone
-Trails galore in Singapore, imagine the fun when I bring this app to Malaysia Gunungs
Johor Waterfalls mural at Kota Tinggi town.
Johor Waterfalls
We had wanted to enjoy famous Kota Tinggi Wanton noodle but shop was closed. Yap Fong Noodle House 叶芳面家 (GPS 1.727552, 103.899047)
Hiking Tongariro Crossing was an amazing experience. The trail covers various terrains, hikers will trek in between two live volcanoes.
And of course we are talking about MORDOR and Mount Doom from LOTR!
It takes a while to sink in, you have seen the pictures in blogs and Instagram, and now Tongariro Crossing is right infront of you.
The day before, I had arrived in National Park (drove from Taranaki and Forgotten Highway). You know Tongariro is special when you can see Mount Doom (real name is Mount Ngauruhoe) and Mount Ruapehu (snow cap) around every corner!
As a warm up, I did both Gollum Pool (Yes, The Gollum from LOTR, also known as Tawhai Falls) and Taranaki Falls , but I will blog about these trips later.
Famous Volcanoes in Tongariro National Park
Before you start, do your homework :
-The start and end point is different for Tongariro Alpine Crossing
-Do not drive as carpark has 4 hours restriction, instead book a return transfer service (coach)
–Most hikers start from Mangatepopo, Soda Spring, Red Crater, Emerald Lakes, and end at Ketetahi carpark
Image from kitchen of “Plateau Lodge”
-There are toilets every hour (or so), bring own toilet paper
-Although some claimed Hiking Tongariro Crossing is suitable for all fitness, it is relatively tough. Imagine 7 to 9 hours of walking and climbing with a backpack. (It will be worse with incremental weather and in Winter).
-Wear proper shoe, Tongariro is mountain hiking. You need the grip and ankle protection
-Rain is very common, DOC video indicates 200 days of rainfall per year!
*It was Summer but temperature was still a cool 5 to 15 degrees. I got 3 layers top, and 2 layers bottom
-Research this DOC (Department of Conservation) video (link)
(At 3 minutes 56 seconds, Devil’s Staircase !)
–Be Prepared (this blog post is only a short summary, read more about layering, nutrition, first aid kit, and hiking safety tips etc)
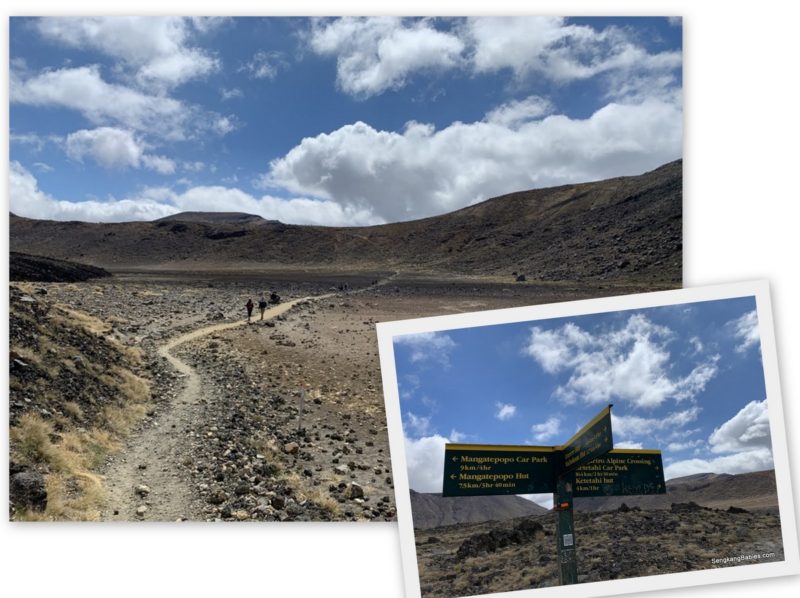
1)Mangatepopo Road End (Trailhead
GPS -39.144511, 175.580958)
Back to Tongariro Crossing. Trampers will most likely arrived by coaches. As mentioned earlier, the start and end point is different, and Mangatepopo carpark has a 4 hours restriction (this carpark is also 1000m above sea level).
You can book the return transfer service through your accomodation or vendors, pricing starting from NZD $40. First coach can be 0530 from your resort.
The signboards provide a Final reminder about the climate and conditions ahead.
You should know how to layer up (example base polyester layer ) before attempting long cold trails. Otherwise internal perspiration might risk hypothermia. (I got to know that for every 10kmh Wind speed, we need to subtract 2 degrees!)
It is Summer, but temperature can still drop to 5 degrees at the alpine ridges (Use METservice app)
Take note of Hiking Tongariro Crossing milestones
-It is all uphill after Soda Springs(4km)
-Red crater is the highest point
-After Emerald (and Blue) lakes, you still have 9 or 10km of downhill trail
-The last few kilometers are downhill, take care of your knees
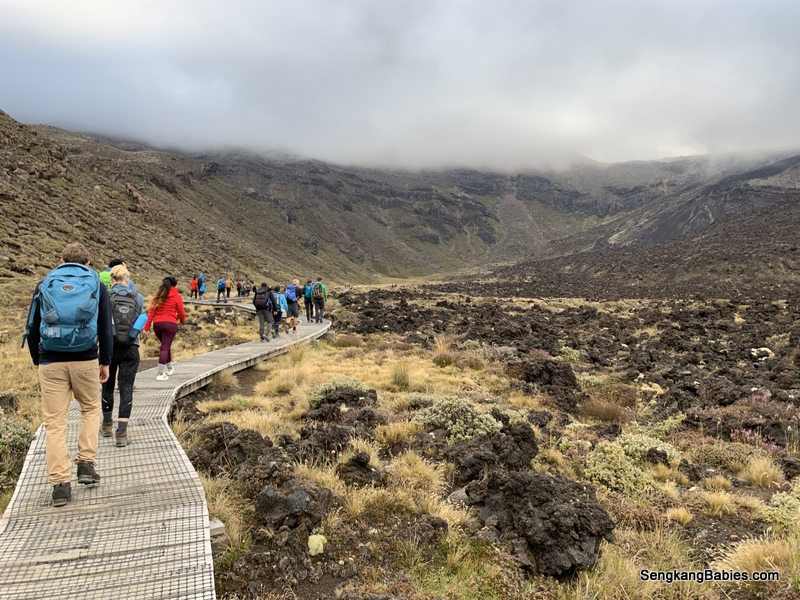
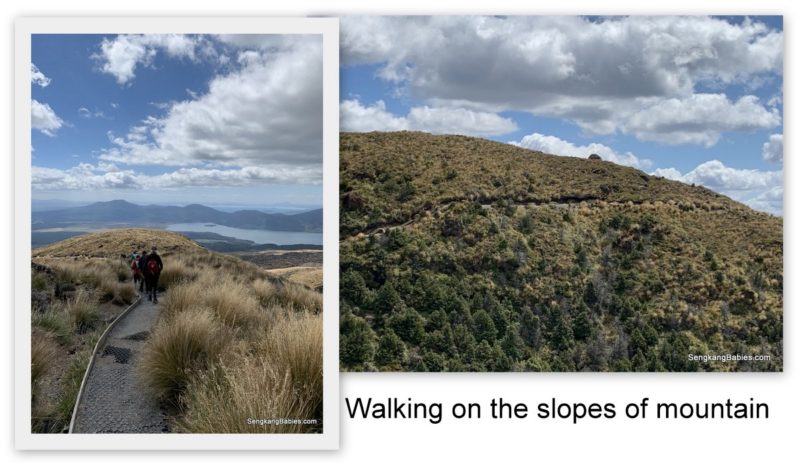
Tongariro Crossing Terrain
You have research and seen all the epic adventures online. Now go and own the 19.4km adventure 🙂
Strava of my hike up Tongariro
*Do take note the photos might not be in sequence.
Tips. You can hike alone or with a group. Just tag along someone around your own fitness. Conversations make time pass faster and delay fatigue.
I had hike during summer, and there must be at least 500 trampers (hikers) along the trail!
Follow the well marked paths and boardwalk. If you hike during Summer, the extra hours of daylight will allow you more time to complete the course (and photos)
Just follow the folks infront, it is very hard to get lost during Summer.
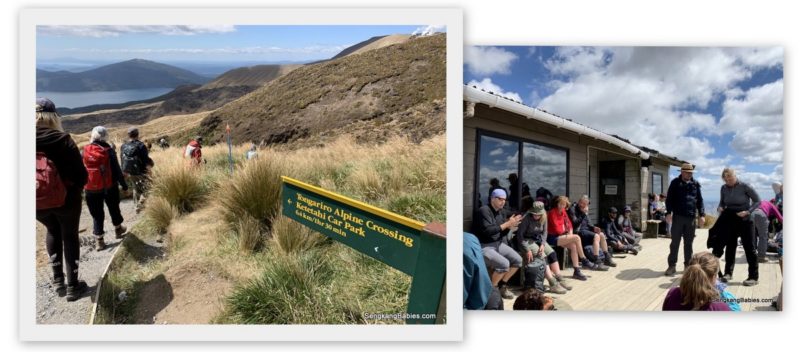
Tongariro Crossing
During harsh weather (or winter), look out for the orange triangle markers.
If in doubt, always head in the direction of Tongariro Alpine Crossing or Ketetahi Carpark (unless you are making an U-turn).
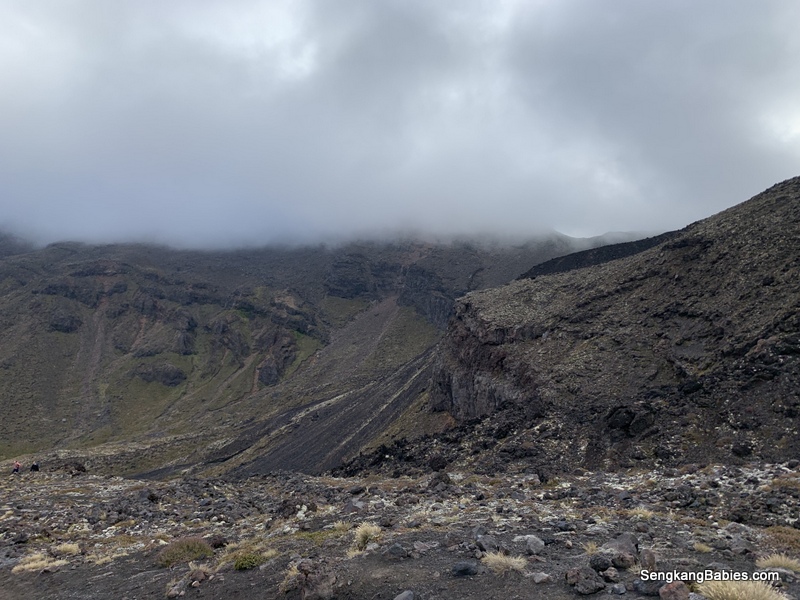
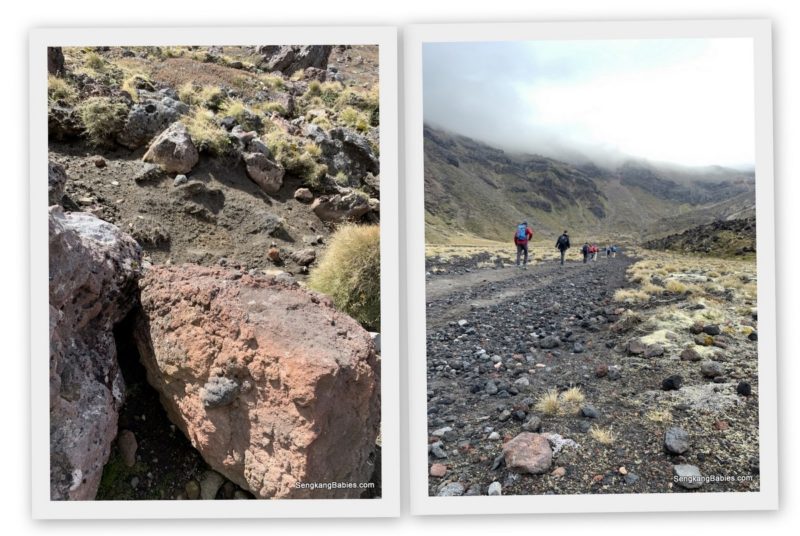
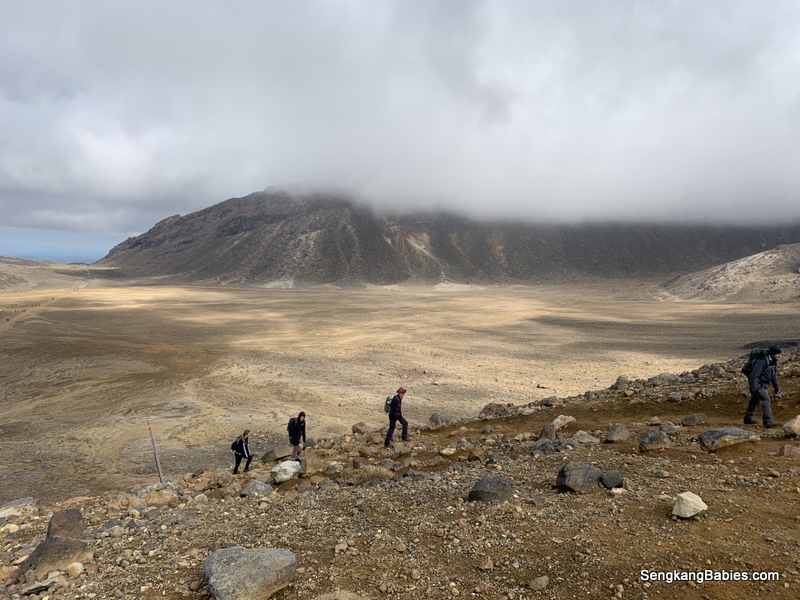
As you hike, look left and right at the scrubs and volcanic rocks. Love the plots of flower beds, I can imagine an explosion of flowers (and colours) along the mountain slopes in Spring.
The horizon looks interesting too as you see the mist and cloud rolling over the ridges.
Along the trail, we will walk between Mount Tongariro and Mount Ngauruhoe. (Fyi, there are three volcanoes in Tongariro National Park, the 3rd one is Mount Ruapehu)
Hiking Tongariro Crossing makes us humans appear so small among the volcanoes! Truly an awesome experience.
Photo below is South Crater, the path between both volcanoes. It does look like moon walk climate.
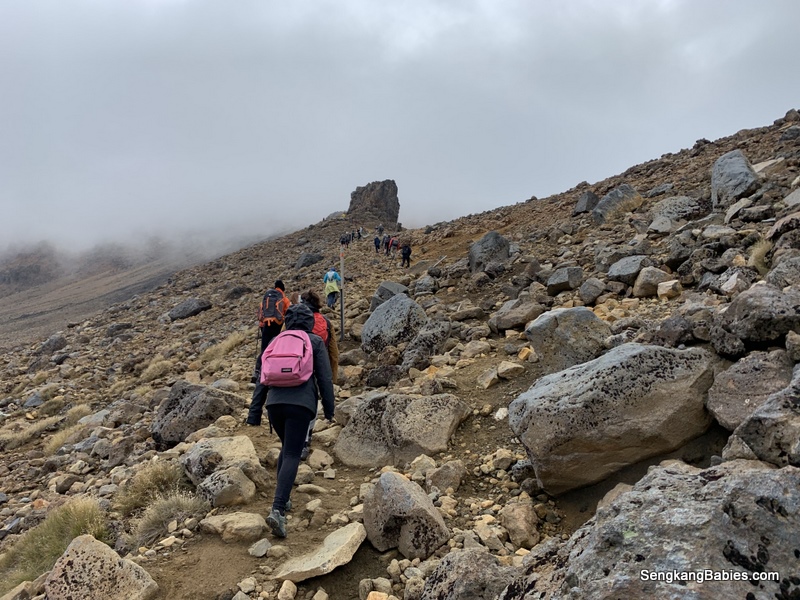
Uphills downhills, rocks and different terrain.
Interesting volcano rocks and ashes, flowers still bloom in this hostile environment.
2)Soda Spring
It took me an hour to reach Soda Spring (from the start point).
At about the 4km marker (Soda Spring), a Blue sign ask you to assess your readiness. If you are already struggling at this stage, the slopes ahead will only get tougher.
By the way, you should take a side track to visit Soda Spring. I thought this was a detour and skip. This is the mini waterfall which you can expect.
Devil’s Staircase is next. No one is counting the steps, but you will be climbing 400m + to reach the ridge. I regret not doing enough stairs training back home!
I was panting all the way up and must have stopped at least 10 times! There are no shelters from the elements and the gusty wind kept snapping at you.
Take note you are climbing between 1500 to 2000m, do rest frequently to catch your breath.
Reminder. Unless you are super fit, you do not need to lug your heavy DSLR and tripod through Mordor.
As a gauge, it took me 3 hours plus to reach Red Crater from Mangatepopo Hut. (Do google for DOC Huts if you plan to stay overnight in the outdoors, or read my Pinnacles Hut experience).
Climate is a cold 5 to 10 degrees, yet I was still perspiring. Very often, I was so happy to reach the top, only to see another peak ahead haha.
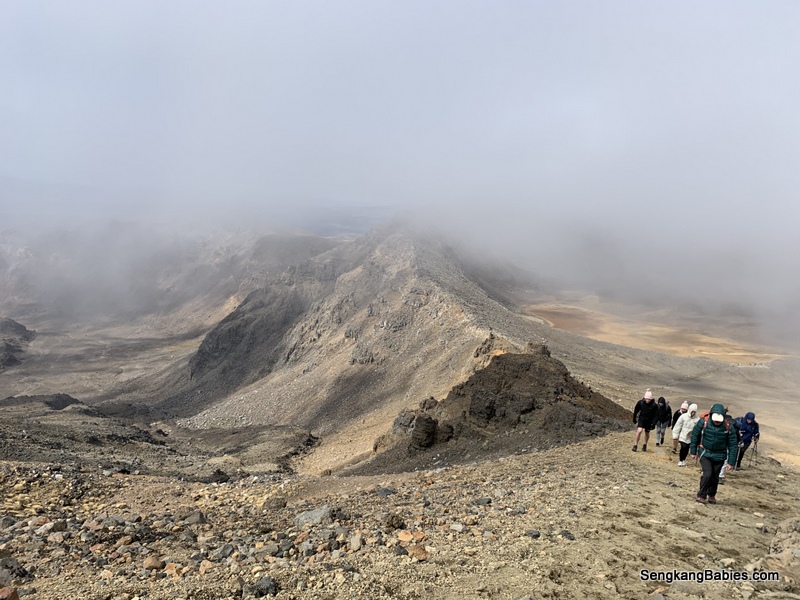
As you walk along the valleys, you can see a stream of hikers going up the volcano trails ahead. Once you leave the valleys, you are exposed to the elements.
I remembered this section as it was near to Red Crater, and I WAS SHRIVELING from the Cold! I got three top layers, yet I felt cold.
As I got tired from the climb, I kept finding shelters behind the rocks.
Some plateau feels like the middle of a desert, others look like craters on a moon. The surrounding is so unreal.
3)Red Crater
It took me 2hr 20minutes from Soda Spring to Red Crater. Infact, the most difficult section for most hikers would be between 4km to 8km.
We know Red Crater is the highest point of Tongariro Crossing. Yet I did not realised I had arrived, I was just happy to overcome another peak.
Many others were taking photos of the track we had covered “below or behind”. Photo below is mesmerising as it felt like we just crawled out of the volcano crater.
Harsh climate
Beautiful ridge and scenery. You can see nearby mountain ranges from the peak. On a clear day, we are supposed to see Mount Taranaki 200km to the West.
Then Red Crater just appear infront of me. YES, I have conquered the hardest part of Hiking Tongariro Crossing.
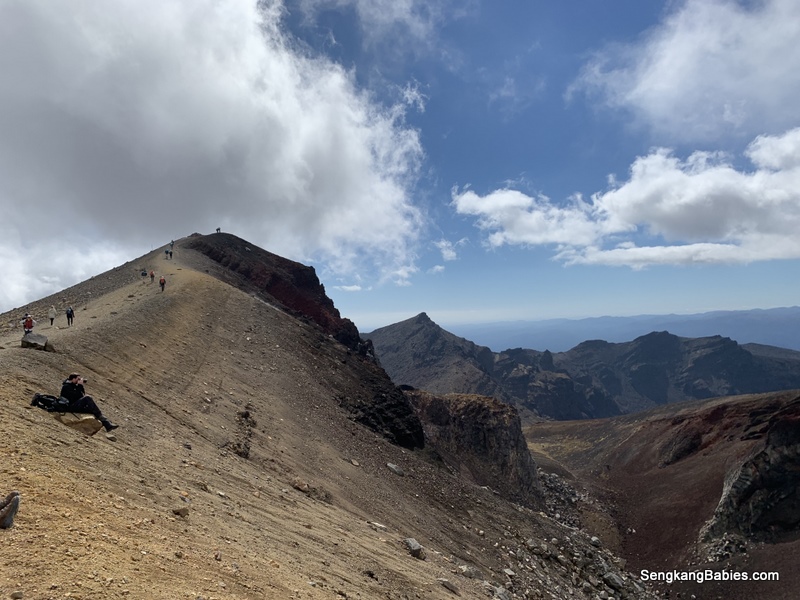
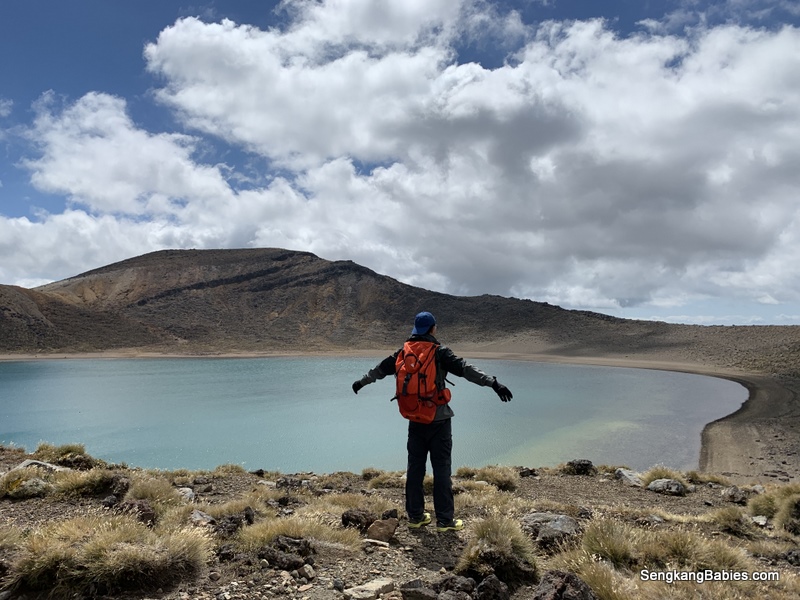
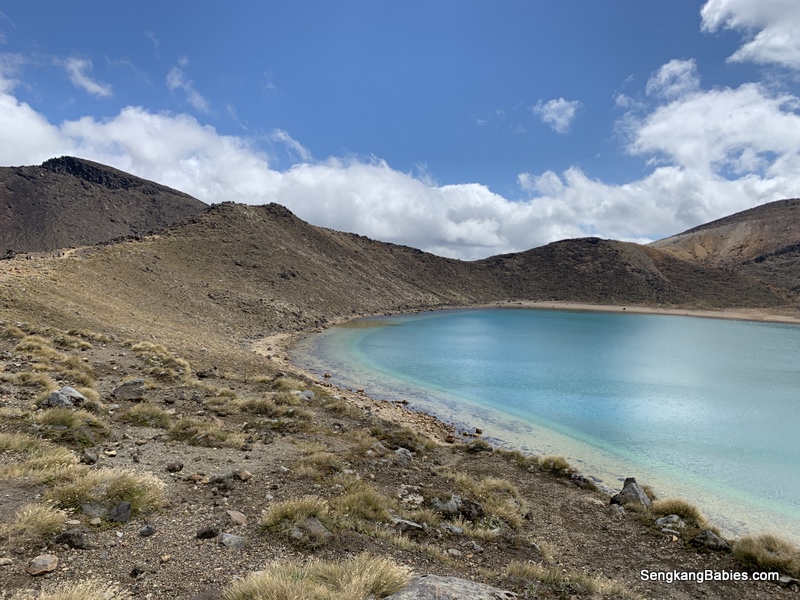
Continue 5 minutes on the ridge and WOW! We will see Blue Lake before the Emerald Lakes.
These are three glacier lakes next to Red Crater. The water sparkled under the sun. Green, Blue in different tones, the lakes are the highlights of Hiking Tongariro Crossing.
Here I am, in the middle of Tongariro Crossing, a live volcano.
And three beautiful lakes welcome the trampers.
DOC (Department of Conservation) indicates that these water bodies are sacred to the Maori.Please do not disturb the water.
Top-left : Trail leads to Blue Lake
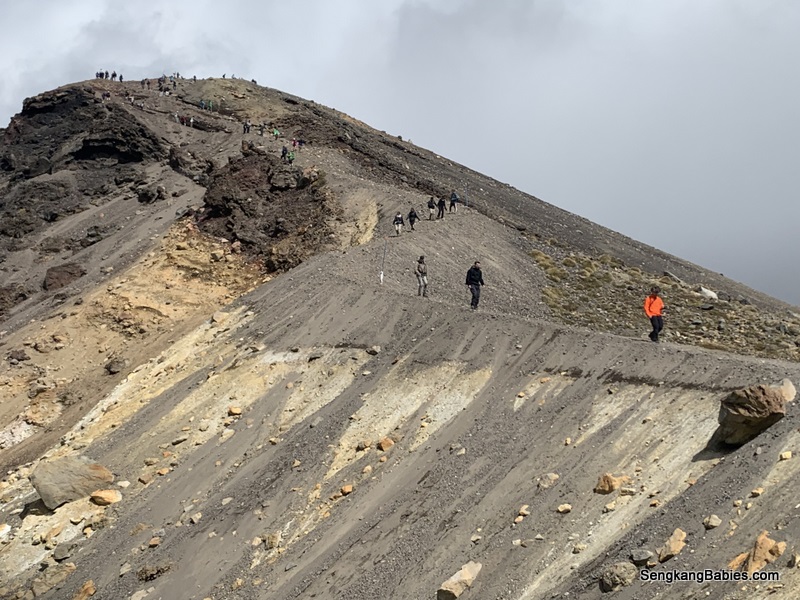
To get a close up look, everyone need to “glide or slip” down the slopes haha. It is mostly volcano ash and I fell on my bum twice. My walking sticks and hiking boots could not defy gravity.
I would not recommend you to run down as some rocks are sharp and you might fall and cut yourself badly.
Once you are downstairs, you can giggle at the balancing trampers as they negotiate a path downhill.
The sulphur smell is strong around this area. The rock crevices and vents are emitting pungent volcanic fumes. You can place your hand near the vents to feel the warmth.
If lava should spew out, we better run for our lives (is it possible to escape?)
Emerald Lakes is easily the most photogenic spots for selfies along Tongariro Crossing. I must have spent 30 minutes absorbing the panoramic view.
Some folks will take their lunch at Emerald Lakes.
Photo above, I am not exaggerating when I mentioned Summer hikers can swell up to 500!
You can still get photo-bombed at 1800m, 19.4km is not so grueling after all hee hee.
5a)Checkpoint (Signboard)
You will come across a Signboard (directional) marker after the Lakes.
Congrats, you have conquered 9 or 10km of Tongariro Crossing. The worst (and coldest) part is behind you.
There are more down-slopes then up-slopes infront (yes, we still have a few up-slopes).
BUT there are still 10km (2.5 hours) ahead of us. Remember the return bus timing? This is the junction where you estimate whether you can catch your preferred bus-shuttle timing
Tips. Walking 1km on flat road is very different from the rough Alpine terrain. Very often, I underestimated the amount of time (and efforts!) needed to track across Tongariro Alpine Crossing.
We would have covered 4 or 5 hours already to reach this point, most would show signs of fatigue after the “Lakes adrenaline” wore off.
I needed a short break again. Gentle reminder, please always keep yourself well hydrated.
TIPS. You can actually browse the “hotspots” or 360 degrees view along Tongariro Crossing from Google Map‘s street view. Try to spot Sam and Frodo’s Mount Doom covered in SNOW!
6)Blue Lake (GPS -39.123961, 175.660667)
Follow the trail behind Emerald lakes to reach Blue Lake. It took me about 20 minute to walk from Emerald Lakes to Blue Lake.
At the peak, look back and witness the trampers cutting across the valley.
Below photo is one of my favourite, it captured two volcanoes top-right. Mount Tongariro infront and Mount Ngauruhoe (Mount Doom) behind.
(You can actually take a side road to hike up Mount Doom too, return trip would be 3 or 4 hours.)
Mount Doom LOTR New Zealand
Blue lake is the largest on Mount Tongariro and it does resemble a swimming pool! If only this lake is not sacred or acidic, I would not mind taking a dip.
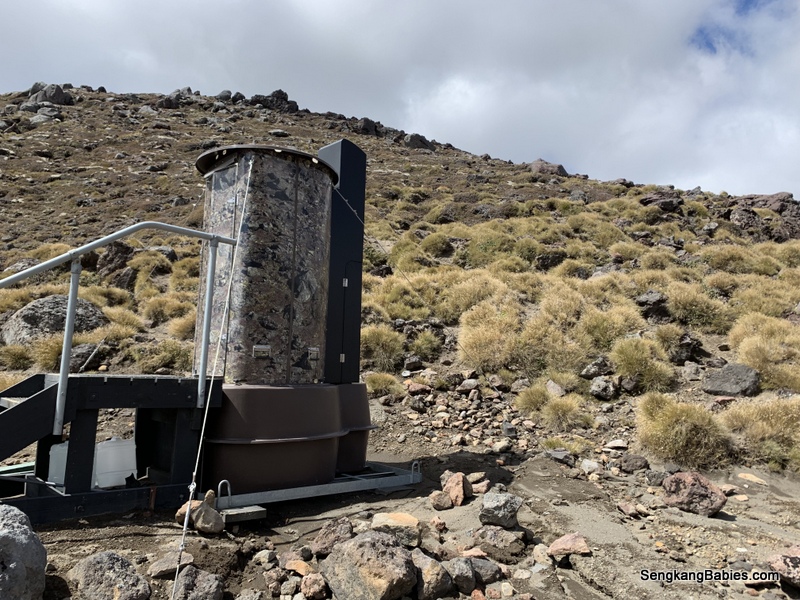
Tips. Toilets are readily available along the trail, every 1 or 2 hours. Fyi, outdoor toilets in New Zealand (or campsites) are “long drops”. Just a pit at the bottom, bring your own toilet paper.
Imagine, hiking to the ridge, and you suddenly see a queue! I do wonder who (and how) the waste are cleared though.
In New Zealand, hikers do not have a habit of peeing next to trails as Kiwis do not want to introduce human traces to nature.
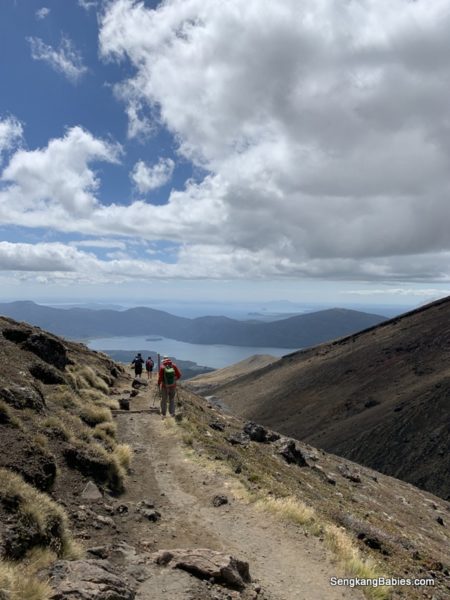
Following on the Tongariro Alpine Crossing trail, we will now head towards another lake (Is this Lake Rotoaira?)
But I love the alpine views of mountain, slopes and lake in the background. New Zealand is such a pretty country, blessed with so much nature.
Endless zig-zag down the slope! But I would still prefer these over the uphill steps. These final trails cannot be rushed, follow the road-sign for a good time effort estimation. (example 30minutes for 2km walk)
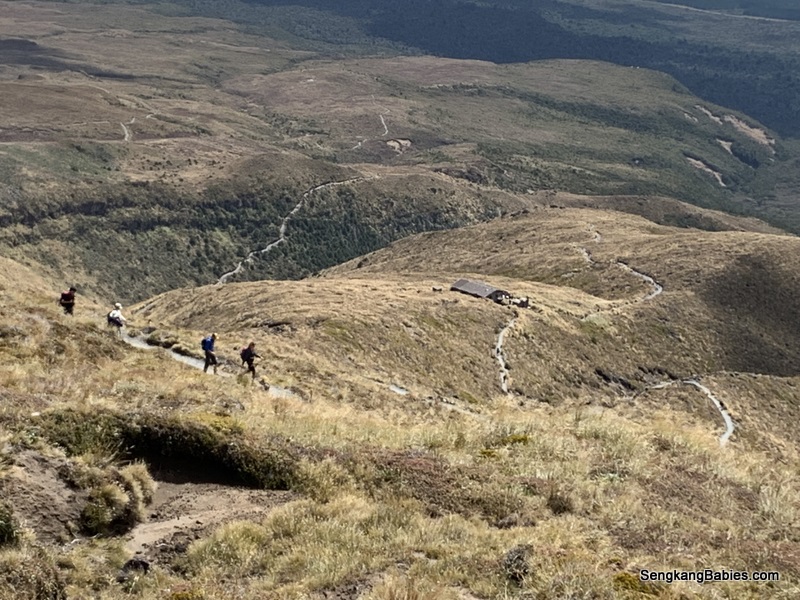
As an estimate, you will pass by a hut about 1 to 1.5hours from Blue Lake.
Scenic Tongariro Crossing
7)Keketaha Hut (or shelter)
Google told me this hut is closed after volcano activities threw some huge rocks onto the hut! (GPS -39.107961, 175.653026 ). Fortunately, no one was hurt.
Bush trail for the last kilometres. We are walking on paths carved out from the side of the mountain.